|
|
 |
|
THE LOST
WAX PROCESS
THE MANUFACTURE
OF BROOCHES
1. Select and research subjects.
2. Create drawings with
images and specifications. [Photo B001]
3. Create
a positive clay (sculpture is created at enlarged scale, typically
4:1 scale). [Photo B002]
4. Make a negative rubber
mold from the positive clay original model.
5. Cast a
positive plaster for approval and final editing.
6. Cast
a negative plaster to proof draft angles and mold release properties.
7. Make a positive rubber mold at a 4:1 scale.
8. Cast a negative
epoxy template to be used as master tool for generating 1:1 scale
negative front die. [Photo B003]
9. Use a
reducing, three-dimensional engraving machine to cut the front die
at 1:1 scale. [Photo B004]
10. Cut the rear die,
allowing offset for finished metal thickness. Add gates for
channeling molten metal into die cavity and engraved negative logo
crest in rear die. [Photo B005]
11. Assemble front
and rear dies.
12. Inject wax at high pressure to
completely fill the die cavity.
13. Trim and chase the
wax; remove wax from die.
14. Assemble individual waxes
on a tree, typically 5 brooches per tree. [Photo B006]
15. Build up the ceramic shell around the wax tree.
16. Fire the
ceramic shell, setting ceramic and melting out the wax (thus the
name “lost-wax casting”).
17. Place ceramic
shell (now with voids left by the melted out wax) in a vacuum
chamber and pour molten metal (bronze, sterling silver, 14K or 18K
gold) to fill the voids.
18. Break ceramic shell; remove
solidified metal casting.
19. Remove gates; sandblast the
casting to achieve a uniform finish.
20. Silver solder
fittings (pin, latch and pivot). [Photo B007]
21.
Apply finishes:
a. Bronze: Acid etch/two-step rinse/plate
with “sepia” finish/hand scrub with cleansing compound/final
two-stage rinse/dry/coat with clear varnish.
b. Sterling
silver: Hand polish highlights/acid etch/two-step rinse/plate with
rhodium (a member of the platinum family which imparts a
scratch-resistant, bright finish). [Photo B008]
c.
Vermeil: Hand polish highlights/acid etch/two-step rinse/extremely
heavy 24K gold (a beautiful color of gold, much richer than most
commonly seen). [Photo B009]
d. Gold: 14K (58.5% gold)
and 18K (75% gold) castings are hand polished to achieve desired
highlighting.
22. Final inspection, packaging, shipping.
[Photo B010]
|
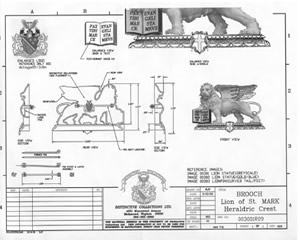
Photo B001
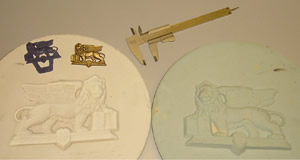
Photo B002
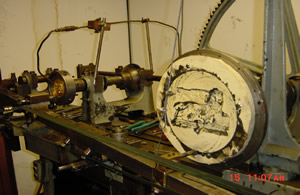
Photo B003
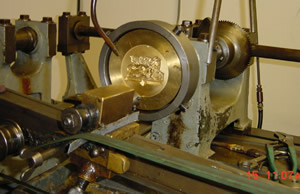
Photo B004
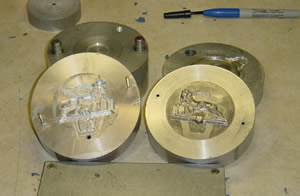
Photo B005
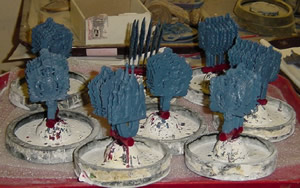
Photo B006
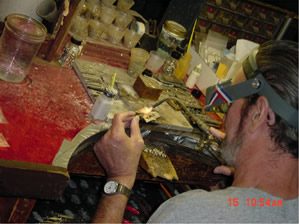
Photo B007
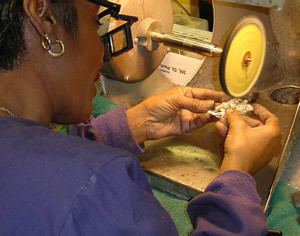
Photo B008
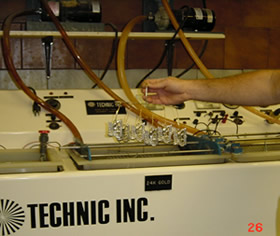
Photo B009
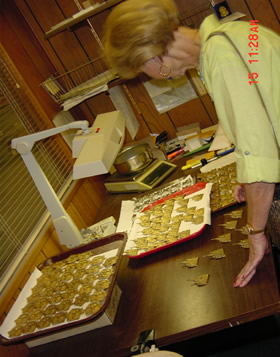
Photo B010
|
THE MANUFACTURE OF "JACK"
1. Select subject.
2. Create design sketches and develop
drawings and specifications. [Photo J001]
3. Sculpt a clay
model -- see “Ring Dwarfs” model in clay. [Photo J002]
4. Address the production concerns, formulate and define the necessary molds
and casting processes.
5. Dissect clay model and create
separate molds for each cast component. “Jack-in-the-Box” is
comprised of ten individual molds:
a. Upper body
b. Base box
c. Open lid of box
d.
Right leg
e. Right arm
f. Left arm
g. Jester hat point (left)
h. Jester hat point (center)
i. Jester hat point (right)
j. Decorative key
6. Create the ten waxes.
7. Trim and chase each of the ten waxes.
8. Build up ceramic shells around each wax (ten individual shells).
9.
Fire the ceramic shells, setting the mold and melting out the wax --
thus the name “lost wax.”
10. Place three ceramic
shells (upper body, box and lid) in banked sand to prevent cracking.
Pour the individual bronzes.
11. Place the seven smaller
shells in vacuum chamber; pour the molten bronze into the shells.
12. Break ceramic shells, leaving bronze where wax once was.
13. Saw
off the gates and vent tubes; sandblast the bronze to remove
remaining ceramic particles.
14. Assemble the ten individual
castings by silver soldering and welding. [Photo J003]
15. Hand chase all joints.
16. Glass-bead blast the assembled
casting.
17. Heat the assembled bronze casting and apply the
patina “liver of sulfur” (sulfurated potash), which produces the
desired darkened surface finish.
18. Coat the surface with a
thin layer of clear paste wax to enhance and preserve the patina.
[Photo J004]
|
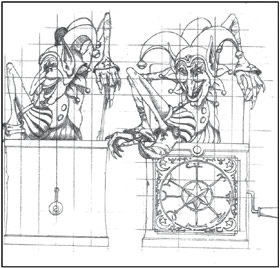
Photo J001
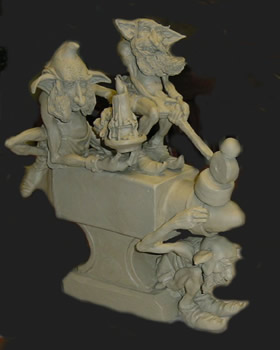
Photo J002
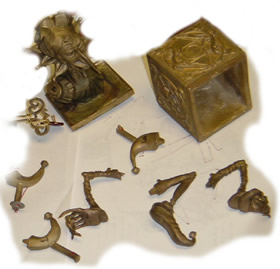
Photo J003
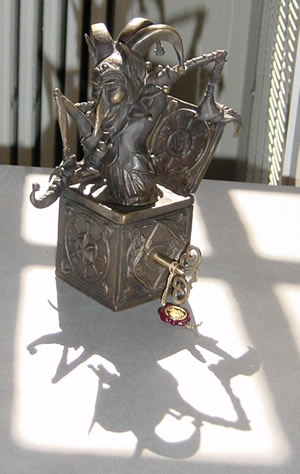
Photo J004
|
|
|
|
 |